

SSL Certificate Guide - GroupWise & OES Product Families
Within the Open Enterprise Server and GroupWise product family there are numerous requirements and configurations in order to secure the components with SSL Certificates. Most of the services, by default, use self-signed certificates. This is no longer a recommended practice, and it is generally more desirable to use certificates from trusted 3rd party certificate vendors. Across the "Novell" product line there are many different configurations and controls for the certificate implementation. Depending on the service, the implementation will vary. And in many cases, the format and file requirements for the certificates may vary by service. This guide covers how to implement 3rd party SSL certificates across the various products and services related to OES and GroupWise.
Currently the following products are featured:
- GroupWise Mobility Service (GMS)
- GroupWise Web (GWWEB)
- Opentext FILR
- GroupWise Disaster Recovery (Reload / GWDR)
GroupWise Web (GWWEB) SSL Certificates
Certificate Format
From the certificate vendor, you typically choose "Apache" format. This typically provides a file with the extension .crt. They also provide their own chain certificates as well in the same format.
Required Files
Requires two files, the Certificate and the Private Key file.
Certificate file: server.crt
Key file: server.key
Note: For GWWEB, the actual names as listed above are required. They are not sample names or placeholders.
Key File Password Status
Key file should NOT have a password.
Command Line to run GWWEB and load SSL certificates:
docker run -d --rm -v /opt/novell/gw:/etc/nginx/gw --name gwweb -e FQDN=webacc.acme.com -e DNS_SERVER=192.168.1.5 -p 80:80 -p 443:443 -v /opt/novell/gw/certs:/certs mfgroupwise/web:latest
For a more detailed discussion about GWWEB, refer to my GWWEB guide here.
Required Files
You must have 2 files in the /opt/novell/gw/certs folder:
- /opt/novell/gw/certs/server.crt
- Obtained from the certificate vendor, it could be named a number of things.
- Copy the certificate file to /opt/novell/gw/certs and rename to server.crt.
- /opt/novell/gw/certs/server.key
- This file was created when you created the Certificate Signing Request, or CSR.
- Copy the key file to /opt/novell/gw/certs and rename to server.key.
Intermediate CA Cert (Incomplete Certificate Chain)
Your certificate chain will most likely be incomplete because there is no directive in the command line to load an Intermediate or Chain certificate. To overcome this obstacle, you concatenate the certificate file and the intermediate certificate file into the same server.crt certificate. The following command will accomplish this task:
cat My_CA_Bundle.ca-bundle >> /opt/novell/gw/certs/server.crt
Note: Substitute the actual intermediate or chain certificate from your commercial certificate provider in place of the bundle file listed in the syntax.
GroupWise Mobility Service (GMS) SSL Certificates
Certificate Format
From the certificate vendor, you typically choose "Apache" format. This typically provides a file with the extension .crt. They also provide their own chain certificates as well in the same format.
Required Files
For GMS, the certificate requires that you combine three files into one PEM formatted file.
- SSL Certificate File (PEM Format)
- SSL Private Key File (PEM Format)
- Intermediate Certificate (PEM Format)
These certificate and key files are combined into one file for use by GMS:
- gms_mobility.pem
Key File Password Status
Key file should NOT have a password.
SSL Certificates Name and Location
GMS uses a single PEM formatted file called gms_mobility.pem, and it is located at /var/lib/datasync. For a more in-depth discussion please refer to my GMS Best Practices page. You will need to combine the certificate and private key files into a single file named and located at /var/lib/datasync/gms_mobility.pem. This is what you'll need:
- The private key file (That you generated when you created the CSR to submit to your SSL vendor)
- Also of importance is to note that GMS requires that the Private Key file does NOT have a password on it. This is the exact opposite of what is required by the GroupWise Agents.
- The server certificate (Generally .crt file) from your SSL vendor
- The SSL Vendor's intermediate SSL Certificate.
Combining All Certificate and Key Files into a single PEM file
GMS requires that all of your certificate files are combined into a single PEM file. You basically concatenate all files together using the sequence below. Please note that you will need to use the name of your specific files, not the samples I have used.
# cat passwordless.key > gms_mobility.pem   (Ensure that you are using the Key File that does NOT have a password on it)
# cat server.crt >> gms_mobility.pem   (This is the certificate provided by the SSL vendor)
# cat intermediate.crt >> gms_mobility.pem   (This is the Intermediate certificate provided by the SSL vendor)
# cp gms_mobility.pem /var/lib/datasync/
# gms restart
Important Notes
Here are some things to keep in mind when updating SSL Certificates for GMS:
- There is no configuration, the name and location of the certificate file is /var/lib/datasync/gms_mobility.pem
- You do not have to do anything in the web admin screen.
- Yes GMS has a tool called "mcheck" that will help you install your certificates. Use that if you want. I don't ever use it.
- Simply restarting the GMS services will load the new certificate file.
- If the Web Admin page for GMS does not load after you have installed a new certificate, it most likely means your certificate file is not correct.
- This single certificate file provide a secure connection for the administration console as well as the end user connection from mobile devices.
Opentext FILR SSL Certificates
Certificate Format: PKCS12 Format
FILR requires a single PKCS12 Formatted Certificate and Keypair file. This file comprises of both the SSL Certificate and the Private Key file.
The PKCS12 file is generated using a command line process that combines the SSL Certificate and Private Key into the correct format. You would have obtained the SSL Certificate from your SSL Vendor, and you should have the Private Key file in your possession already.
Required Files
Files you'll need:
- The SSL Certificate File from the SSL Vendor
- The Private Key file you generated with the CSR
- The Intermediate Certificate from the SSL vendor.
You will need to generate the following to import into FILR:
- The PKCS12 formatted Keypair.
Key File Password Status
You can assign a password to your PKCS12 key pair file but it does not appear to be required.
Prerequisites for the PKCS12 Certificate
If you downloaded the certificate file from your SSL Provider and chose "Apache" as the format (recommended), you generally have 2 files:
- The actual certificate file. It's usually named the same as the website it is protecting.
- The intermediate Certificate file. Sometimes you have multiple intermediate certs depending on the vendor.
In addition, you should have the following in your possession:
- The private Key file. This was created when you generated the CSR (Certificate Signing Request). The SSL Vendor does not have nor should never have this file. You should have it in your possession, and you will need it to create the PKCS12 certificate file.
- In the example below it is assumed that the Private Key file is not encoded with a password. If your Private Key file is encoded (you would have had to do this manually), you'll just need to enter that same password during the process to be successful.
Generating the PKCS12 Certificate Pair File
I use the Linux command line and the openssl tool to combine the certificate and key file into a PKCS12 file. You can do that using the following syntax:
openssl pkcs12 -export -out filr.p12 -in servercert.crt -inkey privatekey.key
The sequence is as follows:
fs:/opt/certs # openssl pkcs12 -export -out filr.p12 -in servercert.crt -inkey privatekey.key
Enter Export Password: (Note the password for later use in the FILR appliance)
You will then have a new file called "filr.p12" in the same folder. This is the certificate file you will import into your FILR appliance.
fs:/opt/certs # ls -l filr.p12
-rw------- 1 root root 3357 Sep 5 18:35 filr.p12
fs:/opt/certs #
Note that this will not put the Intermediate Certificate into the Keypair file, but it is not needed for FILR. You import the Intermediate Certificate separately.
How to Install the new FILR SSL Certificate Keypair

- Launch the Appliance Managment interface and login to it with the vaadmin account. This is a web page located at port 9443 of your FILR server. For example: https://filr.yourcompany.net:9443
- Click on the "Digital Certificates" menu icon.
- In the Keystore Dropdown box at the top, change the option to "Web Application Certificates"
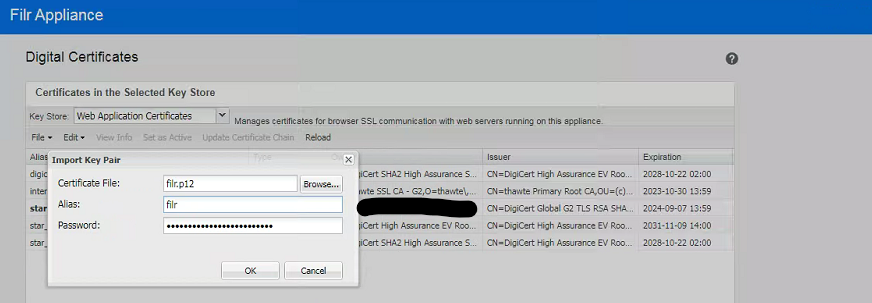
- Click File --> Import --> Key Pair
- Browse to and select your PKCS12 Formatted Certificate File. Then hit "Open". This takes you back to the "Import Key Pair" dialog. You should have 3 visible options:
- The PKCIS12 Certificate File you are importing
- The alias (this is for visual and cosmetic purposes)
- The password. Use the same password you assigned when creating the PKCS12 file.
- When all 3 of the fields are completely, click on the OK button.
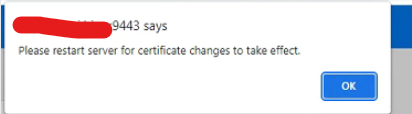
- This will upload the certificate into the FILR keystore. You will receive a prompt to set the certificate as active and restart the server.

Activate the new SSL Certificate
- Click on the new FILR PKCS12 Certificate you uploaded. The option "Set as Active" will become available.
- Click "Set as Active".
- When prompted, choose "yes" to confirm.
- Close the certificate dialog options page.
- On the main FILR appliance control page, click the "Reboot" button.
- Once the server has restarted, confirm that the FILR application shows the new certificate is functioning.

How to Install the Trusted Intermediate Certificate File
- From the same "Web Application Certificates" dialog, click File --> Import --> Trusted Certificate.
- Browse to and select the Trusted Certificate File provided by your SSL Certificate Vendor. This takes you back to the "Import Trusted Certificate" dialog. You should have 2 visible options:
- The Certificate File you are importing
- The alias (this is for visual and cosmetic purposes)
- When both of the fields are complete, click on the OK button.
- This will upload the Vendor's Intermediate certificate into the FILR keystore. You will receive a prompt to restart the server.

Reload (GroupWise Disaster Recovery)
Certificate Format: PKCS12 Format
Certificate Format: PEM
Reload uses PEM formatted certificate and key files. The certificate obtained by your SSL vendor is typically in PEM format and doesn't require any modification.
Required Files
Files you'll need:
- The SSL Certificate File from the SSL Vendor
- The Private Key file you generated with the CSR
Key File Password Status
You should not encode the Private Key file with a password.
Prerequisites
You should have the following two files:
- The actual certificate file. It's usually named the same as the website it is protecting.
- The private Key file. This was created when you generated the CSR (Certificate Signing Request).
Note: You should be using a private key file that has not been encoded with a password.
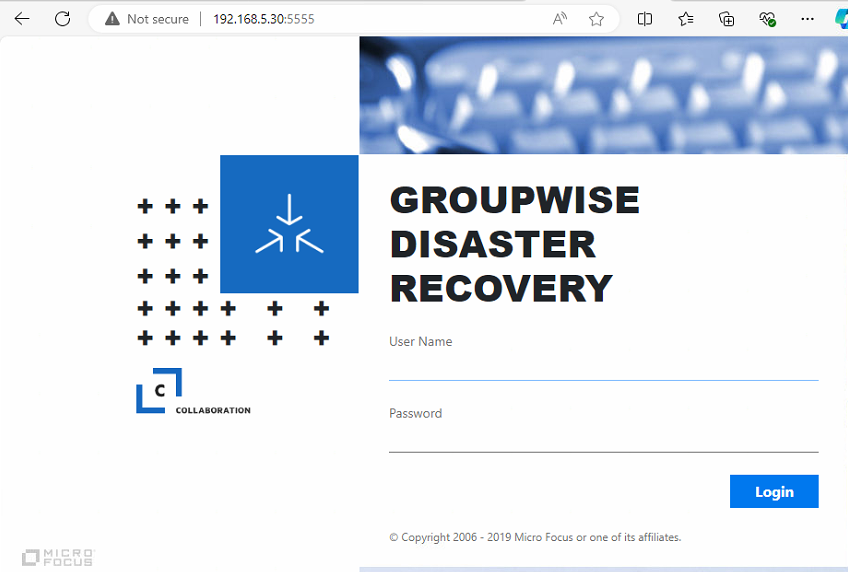
Installing the Reload certificate
Login to the Reload management interface. It is typically at http://xx.xx.xx.xx:5555 or https://xx.xx.xx.xx:5555
** Note that by default SSL and certificate is not configured. However after installing a certificate, SSL should be enabled and the interface accessed via https instead of http.

The process is simple for adding or changing the certificate used by the Reload Web Admin interface:
- Choose the Certificate File with the button provided (This is the file from your SSL Vendor)
- Choose the Key File with the button provided (This is the private keyfile that you should have from when you created the CSR)
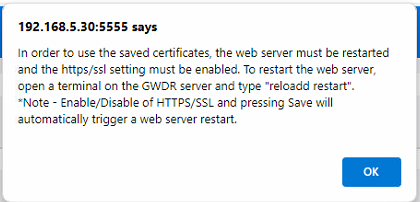
- Click the "Save Certificate & Key" button.
- Restart the Reload daemon at the Linux command line via:
- reloadd restart

When you restart the Reload agent, you should see it load the new certificate file as shown below:
reload01:/opt/beginfinite/reload # reloadd restart
Stopping GroupWise Disaster Recovery Daemon
GroupWise Disaster Recovery Daemon Stopped
Loading configuration file...
Certificate: license/reload.crt
Key file: license/reload.key
Certificate file: license/reload.crt
-D -v -p 5555 -prk license/reload.key -pk license/reload.crt -ssl 1 -a -U admin
GroupWise Disaster Recovery Daemon Restarting with -D -v -p 5555 -prk license/reload.key -pk license/reload.crt -ssl 1 -a -U admin
Waiting 5 seconds to determine Daemon load status
The GroupWise Disaster Recovery Daemon is now running
Important Note / Testing
The Reload Management interface is a little bit quirky when changing the certificates. You may find that the files don't "stick". Keep working at it and you'll get it. Do it one file at a time if you need to. And although the Reload Management Interface may try to restart the services for you, you might find that you still need to do it from the command line to make it work correctly.
To test and confirm the certificate is installed, you should be able to do the following:
- Go to the configuration page and see that it has the new certificates listed in the configuration dialog
- See the SSL Lock next to the URL for the Reload Management page.

Check out the Clinton Fall Festival: https://clintonfallfestival.org